Showing posts with label sewing. Show all posts

Tuesday, May 28, 2024

Bonus Marimekko Free-Form Rugs

0 comments

A view of rectangular mate reflected in mirror

Beauties. I thought that hemming the contours of these rugs would be disastrous and I was pleasantly surprised. Because I tried to hem the rectangular base rug with yarn instead of thread, most of my problems with this simple job could have been avoided. Having switched to quilting thread makes things so much easier. Like with the rectangle, I couldn't manage to figure out the whip stitch so I just straight stitched both. That was another part of the problem with the larger rug.

So now the question is, do I do one more, in kelly? I think it's time to give the kitchen some love with the new chandelier and cushions (finally for the banquet).  

A rather unfortunate
worn spot on oak floors


Arial view reflected


Thursday, May 23, 2024

Latch Hook Bonus Rugs and Another Chandelier Pre-Contemplation

0 comments

Hemming the rectangular Marimekko was too straightforward - let's add curves. I would have liked to have created a larger rug than the 3x5 feet that I ended up working on FOR-EVER, but these mini flower rugs are so adorable and quick to turn out.

Sweet little flower rugs

Also, this is the end, again, of my yarn. Look how tantalizingly close I came to finishing off all of the Sulfur/Chartreuse! I now want to create a freeform flower rug for Tootie Pie's room. I wanted to do a pink tiger skin rug, surrounded by flowers, but now think just a flower. But, my next project will be the lighting fixture installed in the dining area. Here are some of my ideas for the dangly parts for the hooks:


Is it just me, or is no one else noticing anything other than the floaty gathering of objects in the air? We have two arrangements that are orderly above, and two look freeform and natural. Because my floaty gathering is not uniform, lucky me gets the natural arrangement, which will admittedly be easier; I picture one person on top lowering or raising one object until it's perfect, and then what? Knots always make the string ever so smaller and the joy of the arrangements is their perfect hanging. Not for me. I love the neon green behind the boringly dressed mannequins. I have been collecting hand cut plastic flowers for ages and I wanted the string to contain the color, but the magic of these mobiles is that they seem to float, so clear thread it is.

Of course, the two I like best are the naturally hung ones. The one I like best is the first one with the knit blobs, which would be the hardest to create and may look too heavy for the space. I am debating nixing the hanging blooms, but this change in direction means I have cut out the clear plastic flowers for nothing. I also smoothed their edges and pierced them using the hot knife technique meaning I inhaled toxic vapors for nothing, too.

Here are my flowers:


And now that I've made an army of flowers, I want to switch to beaded fish and possibly a blue whale made of beads in an amalgamation of these:


Those tiny 3D fish! I'd need to make around 4,000 of them, but they seem really quick. I feel like fish should be translucent, and flowers not so much, but we're not going for realism. I feel like part of what makes the fish school chandy so cool is the size of the fish to the tiny diameter of the light. My chandelier is wider and so either the effect would disappear because the fish are too small, or I'd need to increase the size of the fish, but they're so adorable like minnows. She gave one fish a trout pout!

It will be flowers in the short term and we'll think about the fish. Do I really need another medium? I just added yarn, I cannot add beads!

LIC artist Eduardo Anievas Blue Fish. I need
iridescence, big googly eyes, and lots of these plump
little jewels


Wednesday, December 18, 2019

Dyeing a Microfiber Couch Sofa Sectional - A Cautionary Tale? DIY Tutorial

0 comments
I guess you'll have to judge from the outcome if this is worth your time. In my case, I had a bit of time over the summer, due to a "parenting schedule" from the court. I have to share my child. On the one hand, I miss her, but on the other, I can fill the house up with noxious fumes in her absence, so, on the whole...I still miss her.

I like it, and that's all that matters.
Couches are pricey. They are mostly ugly, and the few that are not are priced so far out of my range that they require a budget that I don't think I'll be able afford in this lifetime. So what's a girl to do?

Nine years ago, I found a used microfiber Crate and Barrel Bob Mitchell and William Gold sectional. Tootie Pie was around three years old and, unbelievably, a bit messier than her late-tween self, so microfiber fit the bill. And, if you glossed over that modifier "used", yes, it was secondhand Craigslist. Talk about rollin' the dice. No matter how mid-quality it once was, I received it with 95% of its useful life spent. I would need to maintain the H-E-L-L-double-hockey-sticks out of it, which I did, and, still, it was looking drabber than the original sage color.

The tough part about the otherwise-easy-wear microfiber is that its colorfastness also means that adding or deleting color is much harder than with natural fibers, BUT IT IS NOT IMPOSSIBLE, even for the home DIYer.

Cold water dyes, like the type you can run through a washer, will not work for man-made fabrics. For poly fibers, the fabric must be boiled. So, unless you're considering yanking out all the staples, pulling stitches, and then running the part covering the frame (I never considered this), then you will end up with a two-toned sofa, like mine.

Are you okay with this for a minute?
The first thing you need is a dye that is for polyester. Regular dye won't work. In my case, the couch was out of commission for at least a week, because only one cover fit into my biggest pot, and with 12 cushions being washed first, then boiled, then washed and dried, even with the most efficient assembly line, it would take a good amount of time. I should mention that I don't work in the summer. And, it needs to be warm when you do this, for two reasons: one, fumes from the chemicals in the dye, and two, in my case the pot over-boiled and doused the flame, and so you'll need a breeze to remove the gas from the home so that when you try to relight it, you don't blow up the entire block.

Future phase of project Lipstick on a Pig.
It is admittedly a short-term fix that I will somehow need to stretch into a decade or more of use, but it looks somewhat intentional that the base matches the walls and the cushions coordinate with the curtains. It also brings out the teal in my Jonathan Adler sample sale octagonal tray and silk Chinese bookmark holder. I also made buttons from a similarly shaded pillowcase found at Salvation Army, that was made of natural materials, so I dyed in the washing machine, and then cut up and used a ton of fabric glue to make 8 buttons per back cushion (of which there are seven, including the matching "throw" cushion). I have not gotten to sewing these on, however. Perhaps around the newly refreshed sectional's 5-year redo anniversary?


Tuesday, December 10, 2019

Carrot Halloween Costume DIY Tutorial

0 comments
Yours should not be this tapered
up top
Hi all! First of all, link props! Template to create my cone (the one I used was from FloraCraft and had a 5.8" height and a 2.9" base diameter). https://www.blocklayer.com/cone-patternseng.aspx

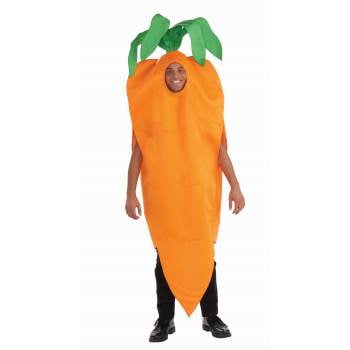
And, the inspiration for her carrot, primarily from this tutorial: https://makeit-loveit.com/diy-carrot-costume-fun-for-any-age-plus-one-to-give-away. I toyed with the idea of the top of the carrot covering her head, a la this poor guy-->, but she decided against it. I think a wise choice for a tween! In any case, I used a shirt dress to make the pattern, changing the hemline to approximate a carrot. I would suggest not tapering yours as fast as I did, because it became a bit form-fitting once I pinned the two sides together. So, perfect cylinder from the shoulders to past hips, and THEN start to taper.

pinned to check fit
After sewing, it became
thinner in the middle
Creating the lines across the front and sewing the two sides together probably took less than an hour. Cleaning the sewing machine, which has been subjected to many ceiling collapses, took another 20 minutes, plus drying time. Ugh.

Added extra because paper
template was snug
cone, awl and greens
The headpiece had me stymied for a while. I bought 8.5x11" sheets of lime green felt and painstakingly cut fronds that I had intended to attach to wire to fashion the long, upwards carrot top, but my test run had too many problems: first, I didn't have wire strong enough to hold the felt upright, and secondly, I didn't see how I'd be able to paint any kind of metal to be green. I bought some extra long, neon green pipe cleaners, and singly and doubly they were also not strong enough.


I went to Michael's, however, to pick up a button or some fastener that I could use to zhush up the neckline, which would have an orange felt scarf with green stripes pinned to the side. Somehow I ended up with a styrofoam cone and some greenery. Using a template maker, I transferred the pattern to the green felt, but before I did so I put the paper template around the styrofoam, and it was a bit snug, so I extended the lines out on the felt. The awl was used to start a pilot hole in the top of the cone. I didn't need to even glue the greens in, it was so snug. The felt was then hot glued to the sides of the cone.


Now, how to get this onto her head. She had a baseball cap, that was custom painted by a friend, but I had the pipe cleaners, and baseball caps have eyelets in each section, so I twisted and hot glued and covered it all with the lime green felt fronds from my aborted mission, so nothing went to waste! An orange shirt and pants from Salvation Army, and, all-in-all, a great costume. She was being called from across the street while trick or treating. It is a distinctive costume from far away, in the dark! And, it was a windy night, but warm, and the hat stayed on, for the most part. Success!

Monday, June 1, 2015

Mermaid Costume Tutorial

0 comments
This was a lot of work for very little payoff, but I guess that's the theme song of my life.  Originally, in the grandiose, what-was-I-thinking phase of the birthday planning, I imagined Tootie Pie wearing this at her 2-hour party (one hour of which was spent in the pool) and photographing her with each of her party guests.  Ya know, so each thank you card could be personalized?  Because, the only thing more tedious than dusting off my never-that-great-to-begin-with Photoshop "skills" to make a thank you card is making twenty different thank you cards.  So, that's not what happened.
 What did happen is, after many an unhappy fitting, and glitter everywhere, we used this costume exactly once, for her thank you card.  Oh, and the backdrop was used the same number of times, but that is now "art" in our basement stairs.   

All you need for this project is sequinned stretch fabric and tulle.  I followed this tutorial for the skirt.  I love the speech bubbles on the photo where her daughter was complaining that her arms were too tired.  Adorable.  For the top, I used the pattern here and followed the tutorial here.  Rather than sew it to a leotard, I sewed elastic to it, since it was not intended to be worn long nor in public.

In the photos, she is wearing a Strawberry Shortcake wig, bedazzled with a purchased pressed paper starfish that I added dimension to with a glue gun, and then dry brush painted it with gold paint.

In the card, I added waves using Photoshop, and some text.  All in all, I think the end result came out quite nice.


Sunday, October 19, 2014

Elsa Costume Part 4 - Complete!

0 comments

 Well, I finished it, and with weeks to spare.  The good news is that it will be much harder to steal than the Kitty head.  For info on how I made it, find the three prior posts.  She loves it, and I'm fairly happy with it.  We will do her hair and makeup on the days she will wear it.  Let it go, let it go!


Tuesday, September 23, 2014

Elsa Costume Part 3: Putting the Pieces Together

1 comments
Let it go...
Let it go...
We're beginning to see something resembling Elsa!  In these pictures, she is holding the bodice, which is sewn onto the skirt, to the undershirt, which has not yet been attached to the bodice.  As you can tell, she is loving it. 

Glittering the cape.

So, all that remains is the glittering of her cape, and attaching that, and voila, I think we're good to go.  I've started glittering the cape below, and since I'm older and wiser, I put freezer paper underneath the design while the glue was drying, therefore eliminating the need to painstakingly remove the stuck-on paper with a Q-tip and nail polish.


Wednesday, September 17, 2014

Elsa Costume Part 2: Undershirt, Skirt and Bodice; and Cape Template

0 comments
A sleeve, mid-glittification.
Edged with a zigzag stitch in metallic
silver.  The finger loop attached to end
of point.
The planning took seemingly forever, but once I started with the actual fabric, serious progress has been made on the Elsa costume.   The first thing I did was cut the performance fabric for the undershirt, and before sewing the pieces together, I glittified them.  I used the drawing from this photo to create a template on graph paper.  I used fabric Modge Podge to adhere the glitter to the fabric, but my mistake, and there's always a mistake, was to let the glue dry on the graph paper.  Naturally, the glue stuck to the paper, and I needed to soak a Q-tip in nail polish remover to take the paper off the back of the fabric.  So, dear reader, after putting the glue on, remove the paper from the back of the fabric!!!  I sealed the glitter with another coat of the glue so that glitter would not be everywhere when the costume is worn.  It is too late for my house, as glitter is in every crevice and corner, but nevermind.  I edged the performance fabric with a zigzag stitch in metallic thread.  Now that it is sewn together, I will connect the glittered arm designs across the chest and back using this drawing as my guide.

The bodice was the easiest part!!!
I was scared about the bodice, because I've never sewn sequined fabric before.  Okay, her mermaid costume was faux-sequined, and the glue attaching the sparkly bits clogged my sewing maching needle, but the bodice fabric had actual, sewn-on sequins on it.  It could not have gone more quickly or easily.  And the skirt was the same; those two pieces came together beautifully.


Copying the design to paper


So, on to the cape.  I traced from this site, and I used my school projector to copy it to chart paper (sometimes, just sometimes, being a teacher comes in handy).  I cut it out and fit it to Tootie Pie, who claims it is not long enough.  She is technically correct, since Elsa's cape is luxuriously flowing, but I'm not 100% convinced that her teachers will be pleased if she comes to school wearing a 7 1/2 foot long cape. 

She insisted on posing like
this!


Long enough, n'est pas?


Sunday, September 7, 2014

Elsa Costume Part One: Fabric, Pattern and Mock-Up

3 comments
Not too bad...
Ouch!
The season's most coveted costume, Queen Elsa of Arundel, if it was bought in a store, which it cannot be because it is backordered, would cost much more than I spent on fabric.  But, that being said, I could have spent a LOT less on the fabric.  I am a wannabee fashion designer and absolutely love browsing the Fashion District here in New York.  It was my birthday, so I justified my expenditure that way, plus, after years of trolling, I finally had a reason to buy something.  I got caught up, what can I say?  So, the amount of fabric, by the yard was:

  • Undershirt: one yard performance fabric from Spandex World (middle left in pic)
  • Bodice: one yard sequin fabric from Cut Fabric (only needed a half yard, but they have a one yard minimum) (middle right in pic)
  • Skirt: 3 yards satin charmeuse from Cut Fabric (far right)
  • Cape: 2 yards iridescent organza from Cut Fabric (far left)


The pattern for the bodice and the undershirt
Pattern for skirt
Since I didn't have a princess pattern lying around (I don't have any patterns at all), I needed to make my own pattern for the Elsa Halloween costume.  I took Tootie Pie's measurements: waist, from waist to floor, from shoulder to wrist and from wrist to the start of the middle finger. Then, I researched others' patterns from throughout the internet, which you can find in my Pinterest board "Costume".  The best tutorial is here.  Warning!  If you do start this process, you will become exposed to all sorts of adults making costumes for themselves; there's a whole world out there of which I was only tangentially aware.  Anyhoo, I wanted the undershirt to be more boatnecked than roundnecked, so I incorporated design inspiration from all the patterns. I drew my pattern pieces on newspaper fliers, and then cut up an old t-shirt and nightgown to make my mockup.  I made adjustments to the patterns, and here they are, along with my mockups:


The bodice mockup.
I will cut the actual
bodice into a V at the bottom,
which is why the front is
so much longer than the back.

So, it fits pretty well on my model.
For reference, Tootie Pie is a very tall, 52" 7-year-old.  She loves the one-sleeved, hold up the bodice, stick-out-one-leg-so-it-doesn't-fall-down skirt, so imagine how she'll feel when it's done!


The Hard Way Copyright © 2012 Design by Ipietoon Blogger Template

Blogging tips