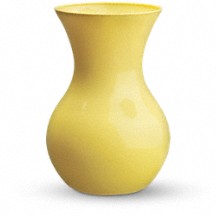
Monday, December 3, 2018

Bjorn Wiinblad Head Vase Tutorial DIY

0 comments
My cheaper version
The vase I missed out on! Anyhow, it looks top
heavy and would certainly be broken in Tootie
Pie's dance studio/my living room.
It was gone. I went to an estate sale where the Bjorn Wiinblad head vase I had so long coveted was being sold. I got there early, but not first, and a man had bought up most of the "good stuff", including my vase. My hate fire was strong, but I had already bought one of those ubiquitous FTD flower vases that were produced in the billions in the 80s and 90s. It was upside down when I saw it, and realized that it was the perfect shape for a head! So, here we go, it's my version of the vase!

This type of vase is available en masse
at your local charity shop! I'll stake my
thrifting reputation on it!
Step one
Since I needed to cut a hole in the bottom, this vase wouldn't be able to hold water, but I wanted to use Pampas grass since seeing it on my 50th birthday celebration in Block Island, so it wasn't a problem. If you want to put cut flowers, you'll need to line this with a real base, because mine is made of paper. So, I started with a base of papier mache, and then did a second coat. I usually do more with my pinatas, but the poor kids need a drill saw to open them, so I didn't go crazy. In retrospect, I should have sanded MORE at this stage, but I didn't, and I ended up doing more work later. So, sand it well now.

Step two
Then I cut a hole for the top of the vase. I had to cut through the plastic, since this was the bottom of the actual vase. I have a knife specifically for cutting through plastic, doesn't everyone! It gets burnt plastic gunk on it, so don't use a good knife!

Norwegiany is a word, yes?
Step 4 - Gesso
Then I got to the polymer clay. I burned the clay, but I love how it looked like terracotta! Unfortunately, I needed to cover this with white, so it wasn't a great thing for this project. I sculpted a nose and eyes, and, per some of the inspiration vases, flowers to make it look all Norwegian and crafty! I hot glued these onto the papier mache, and then got to the gesso. This step would not have been necessary had I just sanded, but I wanted to use my gesso. I coated and sanded and coated and sanded and coated and sanded. It got old. But, I persevered, and although I was sick and tired of the whole project at this stage (novelty worn off, full on grind mode), I stuck with it because surely each coat HAD to be the last. I lost count, I needed to. Finally, it was ready for the spray. I would make sure that it really is ready, though, because, although sanding spray paint is not a problem, reapplying spray paint to previously sprayed things yields a lovely craquelure finish, which is inappropriate on mid-century modern pottery! At this point it almost hit the trash, and if my attempt to save the project hadn't worked, it just might have. I had to cover it with school glue to kind of bind the edges of the paint to prevent whatever solvents were seeping under the finish and going rogue. The glossy finish took, finally, and I sprayed it with gloss, and I love it.


Friday, November 9, 2018

Mini Cardboard Dubrovnik

1 comments
So cute! Tiny, tiny Croatian flags fly over the walled
city of Dubrovnik
That's a skeleton dunking a ball in the
center of the tie dye!
I had a good run, and I'm proud of myself. It seems that my teaching days are, if not over, then coming to a close. My favorite time of year would HAVE to be June, because observations are over and creativity can return. This year, my school decided on a world theme, and each academy got a continent. My academy got Europe, and I chose Croatia. It was the run-up to the World Cup, and
Croatia has been my soccer team since 1998, when I thought they looked like the 1996 Olympic Lithuanian basketball team, sponsored by Jerry Garcia. Those Croatian
Dubrovnik in place in front of my classroom celebrating all
9 of Croatia's global contributions to society.
uniforms had to be donated by some third-rate graphic design team of the fledgling nation. Or, as it turns out, not. Those checkerboards were the heraldic symbol of Croatia, believe it or not! I love an underdog, so I was rooting for the new Lithuania: Croatia!

In any case, I chose Croatia, and we had so much fun. Thanks to the Croatian superstar, Luka Modric, my students recognized the flag (it features the checkerboard, so the branding works), and the centerpiece of our homage, a miniature Dubrovnik, was truly a group project. I gave the kids creative license to make a building, giving them an approximate size, and they went to town. We had painting and folding and sharpie-ing assembly lines, and I think the final product turned out amazing.

I will miss this type of thing. There is a lot that I will miss. There is also a lot I will not miss. But, now that I'm not in the trenches, I can forget about the pain and agony that went into my labor of love, and focus on the times that made me glad I tried my hand at teaching.

DIY Strawberry Costume

0 comments
Trying on the dress for fit.
Another year, another costume. This year my Tootie Pie wanted to be a strawberry, and so I set to work on the design. We selected a dress from the local Salvation Army for, I think, $2.99. I wanted to buy a pair of brown leggings to go with it, but the price was unreasonable for something she would only wear a few times. I did some Pinterest searches and decided I would make a contrasting neck band, and some strawberry flowers on the head, and then did some template searches. I sized and printed on paper the leaves, seeds and flowers, and cut them out. I then traced the leaves and seeds onto thin cardboard from a cereal box, since I would be using those more than twice unlike the flowers. For the neck band, I used a t-shirt to attempt to get the sizing correct.

I used a t-shirt to get the neck
band around the right size.
Templates I used to cut the shapes
I made very fast progress on everything, until I got to the seeds. Something was daunting about this, but in the end it really didn't take that long. I tried to use fabric glue to attach the different shapes together, but the felt was absorbing it and it wouldn't stick correctly, so out came the glue gun. Tried and true. Since the dress was nice and I didn't want to ruin it, the seeds were pinned on, and the neck band was pinned on, as well. All in all, it was an easy DIY and I think it came out cute. It even won an award for "Most Creative Costume".


The Hard Way Copyright © 2012 Design by Ipietoon Blogger Template

Blogging tips