Wednesday, February 21, 2024

Back to Milk Jugs - Tord Boontje Dup Bouquet Garland Light

0 comments


Yes, I ripped off the design completely.
If you have 100 hours to cut one out by
hand, more power to you!

I really messed up my linen pendant lamp. The finial, which was attached using hot glue, fell off, necessitating an entire pull down to address. During its time away from the ceiling, I got carried away with the doodadding and it is tragic. No photos of the devastation will be shared, but suffice it to say that the clean lines had left the building.

The inspiration
The Midsummer Lamp, by Tord Boontje, has always been coveted by moi. Personally, I like the chrome version, but the paper one was lovelier, somehow. Well, I never forget a lamp, and during my research I found this:

This could be a painting,
but, no, it's a lamp!


And everything changed. My calcium intake is probably reaching unhealthy levels now. I need milk jugs! 

It does get easier and 
faster, but this took forever
Depending on what parts of the container I have left determines the length of the stem, so the set of 3 leaves is on a GMO stem, and the fig leaf's stem was severely reduced. But, all in all, I like my modifications. I even added my own branchy thing at 1 o'clock in the photo, and there will be other additions. I am underwhelmed at my daisies and one of the flowers needed its stem to grow at a Chernobyl angle because someone got carried away with the flower and forgot. The lilies of the valley are daunting and may not be attempted. But, imperfections is what make this OOAK, and the price is FREE!

The possibilities that this opens up is endless. Between the Marimekko rug dup and cutting out Boontje inspired florals is filling my days and fueling my creativity.

When I drink up the milk backlog, I will be making more. I seem to be able to get 5 from a half gallon container, so we'll be increasing in multiples of five. I also like using the bent part from the spout to make the attaching circles, because this makes them splay out more. 

A week's worth of tracing and cutting,
cutting, cutting. 

Update! I found 2 large water dispensers that created some longer garlands. I made nine more in 6 days, upping the count from 14 to 23. Well, that hardly seems sustainable. My poor fingers need another project for a bit, and I have just the one! Let's see how it looks hanging now.

Here it is. So wonderful, I'm in love! I had a selection of incandescent bulbs that will last throughout my lifetime, so I worry about the plastic melting, so I might look into one of those light cages that contractors use to not start fires. In the meantime, this should encourage Tootie Pie to not leave EVERY light on in the house.

I was worried about the fullness, but 
varying the sizes of the branch lengths
results in nice bushiness.


Sunday, February 18, 2024

Pelmet and Macrame Window Treatment Tutorials

0 comments

Two beds ago and three window treatments later,
her room looks nothing like this

There are more window treatment options than just a curtain rod holding curtains. Since changed to a blind, but at one point, Tootie Pie's window once had a velvet pelmet made from a t.v. box and a scallop template, covered in light wadding and then pink velvet. I also found a natural linen 108" long panels, 4 in all, that I dyed a peach shade and then made matching wall art and painted my fauteuil to match. Now, I have gold sequin panels held back with mirror placemats cut and glued to a cheap tie-back. In the living room, these are paired with light turquoise velvet panels.

Using the templates to make the
scalloped edge and an X-acto knife

So now I wanted to make a macrame curtain featuring branches and leaves, and a test project where I tried using the twine I bought years ago for $0.50 for 2 giant spools proved disastrous. Remember that knot tying guild I mentioned back in the Christmas in July swap? Well, Celtic queen that I am thought it would be fun to try those infinity knots and, well, my home is now full of tiny yellow twine filaments. And, for some reason, I was only able to complete two knots when all knotting sense left me and I could not, after 10 attempts, make the third knot. I also need shuttles. 

Chandelier and bookcase are the only clues that this
is the same room as above, but now occupied by
a teenager, Tootie Pie! Oh, the curly curtain that 
she HATED.
Well, my blonde Tootie Pie once justified a $750 communion dress by using the logic that her favorite things about herself was her lips and hair (solid choices, both) and the bubbly style of the dress reminded her of her curls. Well, take my money, now! Well, it so happens that those twisted cones of twine that stayed in my garage for close to two decades remain curled, and so, I added a few ribbons, and now I have a blonde window treatment. Only one knot needed for this project.

After keeping this wonderous tentacled creation in curly girl's room, she wanted it OUT and so I moved it to the kitchen, where it does nothing to block out the afternoon sun, but it does dangle on the wet countertops, so it should get nice and fuzzy by the summer. Not fuzzy as in frizzy hair, but as in growing bacterial fuzz.
Curly curtain's new home


Latch Hooking Again - Pre-Contemplation Stage

0 comments

This is my color mock-up, but I don't like
the distribution of the colors.

So, the ocean themed rug turns out to be cat pee damaged. What's a person to do? Well, once upon a time, I was given a Lucy latch hook kit, and dutifully finished it. No idea what happened to it, but it did go with my red, white and blue wallpaper that my friend could NOT STOP LAUGHING AT. Not that I'm scarred...

I could buy oilcloth
that measures 18"x54"
That would give me one 
and a half 18x18 pillows
with no seam allowance

So, I ordered the canvas, the tools, and the precut wool, and I will be making a 36"x60" Marimekko Unikko dup. I saw the chartreuse and yellow colorway on a pillow that was $90. Now, given that the fabric is going for $35.95 a HALF yard, and the width isn't even 60", my gracious! So, no, way too pricey for a pillow that will be used to balance Tootie Pie's fruit and jam breakfasts. 

Once I decided against buying the pillows, I have been obsessing about them ever since. So, we're going to get creative and latch hook our own 3-color Unikko RUG! So, in addition to the yellow, jonquil, and chartreuse of the $90 pillow version, I will be adding kelly green like in the Unikko below. Since I plan on having 9 poppies on my rug, each main poppy color of yellow, chartreuse and kelly will be represented 3 times. The jonquil will be the stamen, and the black will be used for the centers and stems. Since I am using wool, the white will not be winter white as in the fabric, but a sort of off-white natural sheep color. 
This is currently out
of stock here.

So, I've scored all my colors in wool, precut. If this is something I'd like to replicate, I'll probably just cut my own lengths, since finding old wool stock is not easy. I ended up buying the following number or packages, which contain 320 strands per package:
  • Off White: 6 packages - I also ended up getting two packs of "tan", which look for all the world just like off white, but we'll see.
  • Kelly: 5 packages of Readicut #39
  • Chartreuse: 6 packages of Symrnalaine #43
  • Yellow: 6 packages of Bernat #3100
  • Jonquil: 2 packages of Symrnalaine #54
  • Black: 6 packages of Readicut #48
  • Off-white: 2 packages of Bernat #3173
My canvas is 36"x60", with 25 threads per square inch. So, a quick math says we have 2160 square inches, times 25 is 54,000 threads. I have 320 x 31 = 9,920. Hmmm...I'm off by a factor of 6! Also, if almost 10,000 hooks is intimidating. Fifty-four thousand is impossible! Now I'm wondering if I need a bolster pillow (not).

So, if I keep the size, but lose some detail, by getting 14 knots per square inch gives me 30,375 loops. Now it's down to a factor of 3! Could I cut the 2.5" strands into thirds? Probably not, since each knot takes up 0.5 of an inch of the length, and so 2.5 - 1.5 for 3 loops leaves one inch to be split in 3 pieces, so 1/3 of an inch is left for the fringe, and this needs to be split in two, since each loop has two tails. That means that the pile height will be 1/6" instead of 1 inch, so it sounds not doable, but I'm going to do a trial run anyhow. The thinner the carpet, the thicker the wallet.

Oh, boy, I better figure this out! I should see the mean psychiatrist, Lucy! Let me cancel the orders above. C'mon!

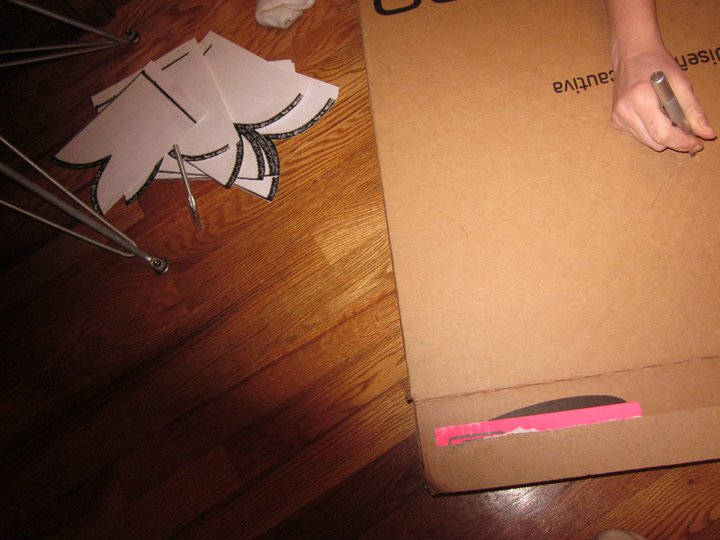
Now what? So, now I go with the cheaper option, cutting my own wool. That should be fun. There are doodads that you can buy to do this, or, and we should know that if there's an OR involved in spending money, I'm most likely going with the OR. I can make a yarn cutter out of cardboard. The only trick is to make it half as wide as you want your threads. In latch hooking, we usually use 2.5 inches, to get a one-inch pile. In my case, now that I have the flexibility, I may go for a half-inch pile, so my yarn should only be 1.5 inches long. Which means:

36 x 60 x 25 = 54,000 x 1.5 = 81,000 inches of wool. I will figure out the proportions of each color next. I am starting to see why they sell these things as kits now! 
70s in a good way, like me


So, this photo is to show how Marimekko arranges 3 different colors, and notice how the colors are very similar to mine! So, imagine the white flowers are the kelly green ones in the above color mockup and you have the idea. But now, what about that blue background? Doesn't that look nice? Maybe we should do this layout rather than the 9 only on mine, above? 

See how the planning leads to more questions? I love it! Fumbling my way towards beauty.

And, so, here it is, in its imagined form. Now I need to source the yarn, determine the proportions of each color (still haven't done that) to get approximately the right amount and then, latch, latch, latch. The likelihood of this project ever being completed is very close to zero, but that hasn't stopped me before. The cost of the wool very well could, though! And, since a tutorial on latching recommended that the strands be no less than 2 inches long, that means I need to figure out the proportions for the colors out of 108,000 inches of yarn. OMG!

Well, the imagining is the fun part. Now
comes the drudgery.

So, let's do it. I used this tool to come up with the following percentages:
  • White: 37% = 39,960" or 1,110 yards
  • Kelly (main, darker): 14% = 15,120" or 420 yards
  • Chartreuse: 13% = 14,040" or 390 yards
  • Yellow: 14% = 15,120" or 420 yards
  • Jonquil: 14% = 15,120" or 420 yards
  • Kelly (secondary, lighter): 4% = 4,320" or 120 yards
  • Black: 2% = 2,160" or 60 yards
Look at that wonderful balance between the kelly, chartreuse, yellow and jonquil. Beauty everywhere!


Sunday, February 4, 2024

Fish Motif - Dory and Marlin Papier-Mâché

0 comments


During yet another convalescence, I have documented my delve into the creative with my adventure with the Whale Song art paper purchase. I asked my sisters if they want the Orrefors crystal whale that my mother picked up at some soirée. And, now, because I need to put up not one, but 2 curtain rod holders, I am fashioning Dory and Marlin figures from paper cutouts transferred to cardboard.

The crystal finback?
Before we get into the process, let me tell you about my esteem for this film. In a way, needing to plan everything so meticulously I think led to its brilliance. The staff were taught to scuba, and everyone at Pixar became immersed in the underwater. And the story came from a long drive shared between the producers or directors, bemoaning how this very drive was preventing them from being with their children. Separation anxiety is real. Life is an adventure, and adventures involve risk. It takes Marlin a while to understand that Nemo can do it. And it took a tang fish with a short term memory problem to show him how.

Cardboard armature base scaled and traced from the internet, I loaded up the base with balls of paper, and then set those in place using masking tape. Over that rough situation, I did a papier-mâché covering, and then set to smoothing this out more by making papier maché clay. Mhhhhhm. With grout, because all the other recipes called for calcium carbonate or spackling compound, not DAP. We are shopping from home, so, I had grout. So, my adapted recipe consisted of the following:

The paper tracing from
internet, plus wads of paper,
masking taped to Dory
armature. Two masking taped
balls will function as her eyes

Now I have started
adding my paper
clay slurry to smooth
out the eyes and
other oopsies.
2 parts water to one part flour, or is it the other way around? The papier mâché base, plus salt, to preserve it. To this, I added shredded paper and let it sit for a bit, and added some light napkins and then Aleene's Fabric Glue, because this is what I had on hand. And, a quick whirl with my immersion blender, and then add in the grout and some corn starch. With this concoction, I smoothed out the joints with the fins and also built up their eyes and brows. And generally made them more symmetrical, if possible. It was fun. Finally, I gave the whole figure a smooth skim coat with my offset frosting spatula.


I also cut out a hand-drawn coral and some wavy grass that I repeated 5 times. The grass was veined with another sliver of paper and papier-machéd with textured crepe paper. The coral was just cut from cardstock and thickened with multiple Modge Podge and supported with scraps of cardboard. These will form the backdrop of the curtain holders. No idea where the fish will go. I kind of wished I would have made an anemone! 

To cover the horrible spackling
job that I did over the staircase:
fronds like you, who needs 
anemones?
In any case, I need to figure out how to make these 3D figurines really smooth, as in the tutorial that I am boldly ripping off. I suppose a sanding is in order. And then, to smooth it out with Modge Podge for that final glossy finish. Then, the paint, the fun part. The part where I realize that the surface is not glass-like enough, as I did with my Bjorn Winblaad vase. We're trying to live and learn...the hard way.

Now, to find out how my DIY paper clay recipe holds up to sanding. It's like sanding grout. But doable. And, sturdy, so that's a plus! But, after painstakingly sanding the dry figurines, I finally decided to rinse them of the dust and then I found that a quick dousing and they are so much more easily sandable! So, even better. Now that they're painted and sealed, I put them in situ, over the staircase. I love my little fish friends!
Well, now the whale is going to eat Marlin while 
Dory watches. She then decides to be ingested
with him and they argue about his belly being 
half full or half empty.


The Hard Way Copyright © 2012 Design by Ipietoon Blogger Template

Blogging tips