Showing posts with label undersized urbanite. Show all posts

Monday, May 6, 2013

Do Your Civic Duty: Vote!

0 comments
I did it!  I made the deadline, mostly.  From what I can tell, not everyone who participated made the deadline.  I would have liked to make shades for each room, and I didn't get the lighting working (aside from the capiz shell chandelier), and I didn't even try to finish the rug.  That's been "in progress" for a year.  The contest took a backseat to the latest project, Tootie Pie's sixth birthday party.  But, I'm not embarrassed by my entry.  It is not up to the standards of Brae at Otterine (seriously!), but one day I may be a her level.  One day in the distant future.  Or, a parallel universe.  But, I'm still proud of myself.
Trying to make a mold of the one
original, large window that came
with the house.  The mold release is
critical, folks.  I almost removed a
finger trying to get my original out
of the mold.
Voting ends in less than a week.  You may place your vote here, and a synopsis of the finalists is here.  I'm still going through all the entries myself.  Big thank yous to Christina of Little Victorian for starting the contest.

My goal, as I stated in the beginning, was not to win, but to learn and network.  So, I've already reached my goal.  Another goal will be to not come in last place.  I'm reaching for the stars here, I know, since, if I'm honest, my entry is nowhere near as good as most of the others.  But, I did my best.  I'm proud how it turned out. 

I had a great time trying my hand at so many different disciplines.  I suffered a punctured finger, spray painted my face (luckily I was wearing my glasses), I knotted my hair up in the electric drill, and got more hot glue burns than I could count.   Seriously, I had a great time.  I'd do it again in a heartbeat.

Sunday, May 5, 2013

Undersized Urbanite Final Reveal

13 comments

"Befores" on Left
"Afters" on Right

The master bedroom
The bathroom
The kitchen


The kid's room
 The living room
The dining room

There is a tutu-clad giant outside the window
and door.  Still working on the lights, held
up with tape.
The laptop is browsing "The Hardway"
We've come a long way, baby.  I bought this dollhouse on a whim, seeking mini furniture for the dollhouse I built for my daughter two Christmases ago.  I actually did not want it at all, since it is large, but the estate sale organizer negotiated it down to $10 for the furniture and house, so I wasn't going to leave it there.  A bout of cancer, a dental emergency, and an intrusive party to be planned all conspired to prevent me from participating in this event, but I perservered.  If anything, Undersized Urbanite kept me from totally losing it.  Please let the cancer influence your vote, also!

If you'd like more details on the progress, check out all of my posts here.


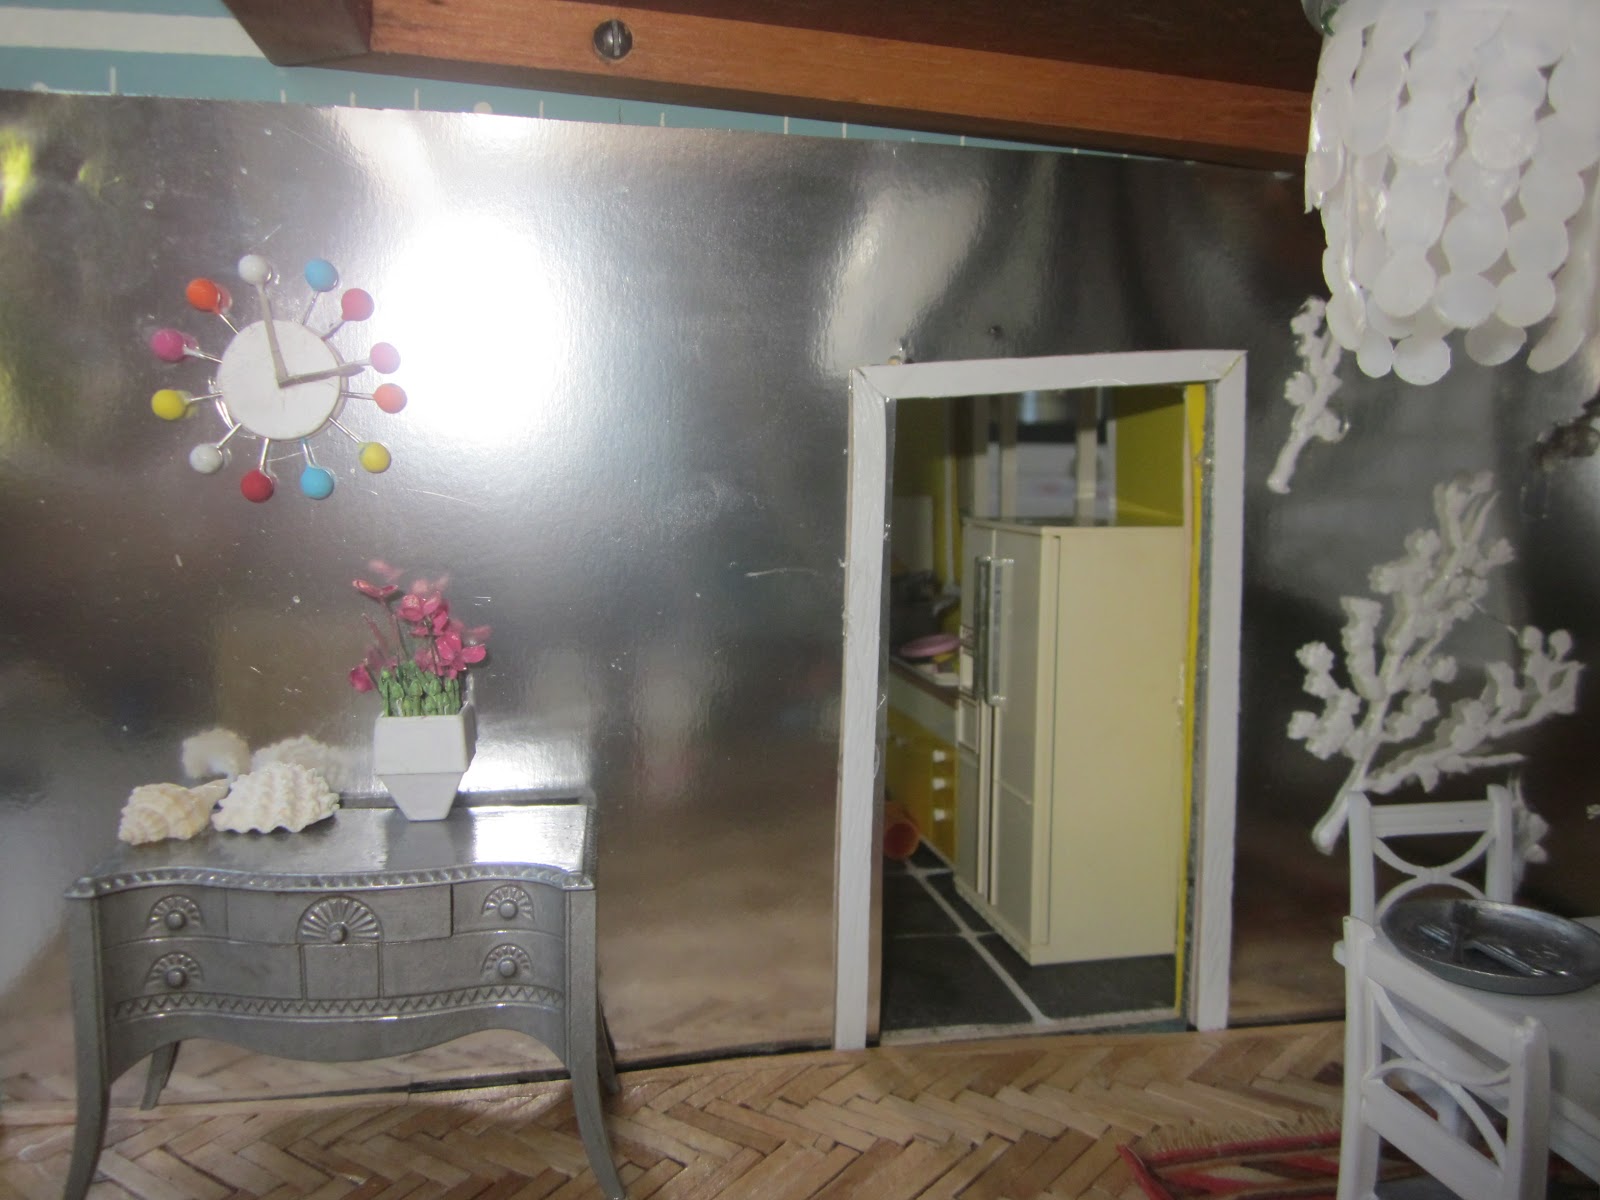
Capiz chandelier, Chinoiserie wall art, Nelson
ball clock in a corner of the dining room.


A transformed corner of  the master bedroom


A corner of the kid's room.


Always dishes to be done.


My cute cape!

Thursday, May 2, 2013

Door Frames AND Window Frames

2 comments
My to-do list for the Undersized Urbanite is reduced to three items: working lamps, Moroccan rug, and the newly added item of window shades.  The deadline is in a week and a day.  I can't believe that I am so nearly done.  Of course, dollhouses are never "done", and I will be changing things up after the deadline I'm sure.

I wanted to make door frames to hide the edges of the wallpaper.  I forgot to frame the front door!  But, the inner door frames are now trimmed, and, since I realized how nice this finishing touch looked, I then made window trim.  The pictures below also show a new corner bookcase in the master bedroom, as well as the Chinoiserie plaster sakura wall art in the dining room.


Saturday, April 6, 2013

Make Your Own Miniature Asian Three Dimensional Wall Art

0 comments
Dining room chinoiserie
plaster cast
I really ought to come up with a catchier name for this "art".  "Asian Three Dimensional Wall Art" just isn't snazzy or concise enough.  In any case, I wanted to recreate the effect of plaster, so my sakura blossom branch designed to conjure up images of plaster chinoiserie.  Rather than paint a version on the wall, I wanted mine to have dimension. 

The inspiration, and the means

I was inspired by some texture on an inherited plastic folding house.  Not being an expert on resin casts, I figured I would make a mold from the plastic house, and then cast it.  Easy, right?  Of course not.  The molding went well; the casting not so much.  I do not recall if I used my mold release or not (I'm going to guess not), the detail was too fine, and the branches and flowers came off in bits and pieces.  So, I painstakingly removed just the blossoms, and then created a vine from hot glue. 

Demolded and grafted back
to its hot glue branches

After this dried, I sprayed it white.  I think it adds interest in the dining space without it being just another picture.  In my own house, I've been straying from framed art to dimensional work.  Of course, my little home should follow my lead.

Thursday, April 4, 2013

Windows Done!

0 comments

The white flowers don't exactly "pop" against
the white windows, but I think the front view
looks nice.  Now, to fix that front door!
Finally!

Another more boring job is finished; cross it off that to do list!  As I mentioned in an earlier post, I had tried and tried to cast a copy of the one large original window that I had for my dollhouse, but after three or four failed attempts, and three or four maddening chiseling of the original from the latex, I had enough.  My replacement windows were made from a plastic basket for the panes, and polymer clay for the frame.  It is nowhere near the professional quality of Brae's work, but I'm just happy to finally have windows for the great room.  I put my "flower boxes" up, since the original 40+ year old fabric flowers were showing their age.  These new flowers are cut from a plastic stem of flowers and hot glued to a polymer clay strip.  I am getting closer and closer to being "finished".

Sunday, March 24, 2013

Creating Replacement Windows for a Dollhouse

0 comments

Not painted yet, but it fits
My vintage dollhouse was a steal, no question.  It did come with a few flaws, however.  It was, and still is, missing the middle chimney, the top to another chimney, two windows, and a piece of the front door.  There is no 1-800-WINDOWS to call and I was waiting for inspiration to hit.  Also, I was avoiding the job.  The attempt with the ceiling panels turned out to be just too thick.  I cut out the sides from a plastic bin and instead of using wood, I used polymer clay to edge it.  I think this is it. 
 
This looks okay, but it was
too bulky
Hot glue stems with resin flowers
In another stroke of genius, I am making progress on my Oriental sakura blossom vine for the dining room.  I was planning to take an impression from a plastic dollhouse that we inherited, and then fill it with clear resin.  The mold was so tiny and thin, the the vine part broke off, leaving just the blossoms, which I saved.  I was thinking that the vine would be made also from polymer clay, but then I thought I'd try hot glue.  I needed to be fast, but I made vine like shapes and placed the blooms onto it.  This, too, will receive a coat of paint.

Saturday, March 23, 2013

Modern Mini Window Treatments

0 comments
Well, this isn't so much of a tutorial as it's a possible foray into a legal problem with The Shade Store.  The Shade Store offers free samples, and these samples are just the right size for mini modern blinds.  I am actually currently without window treatments in my new full-size kitchen, so technically I did use these samples to see the transparency value of the different fabrics.  It is just so difficult to gauge online!  And, of course, I would never advocate abusing the free sample only to use in your dollhouse.  It's just too bad that the Shade Store will not send more than one sample of a certain fabric, since some dollhouse rooms have more than one window, you know.  But we wouldn't be using them for that purpose anyhow, now would we?

A great quality to these fabrics is that they cut so nicely alongside one thread and do not easily fray, so they require no hemming.  You find such fabric in other settings, such as makeup bags and even some reusable shopping bags and possibly placemats.  But nothing beats the quality of the Shade Store.  For your full-size shades, of course.

To finish off my shade, I painted a straw and two beads.  Then I glued the cut fabric on the straw.  That was that!


Thursday, March 21, 2013

Mini Topiaries

2 comments
To add interest to my dollhouse front door, I decided I'd need some sculptural, modern topiaries.  It was a fairly easy project.

Materials:
  • small styrofoam balls
  • wooden dowel
  • preserved moss
  • tacky glue
  • styrofoam chunks
  • matching pots or planters
  • hot glue
  • dirt

Procedure:

  • Take some preserved moss, and break it up into tiny pieces.
  • I wanted a graduated topiary, so the bottom ball is left in its original state, while the top two balls were smooshed to differing degrees
  • Pierce the styrofoam balls with the dowel
  • Paint the styrofoam with glue
  • Roll the styrofoam in moss bits
  • Let dry
  • Push the styrofoam chunks into your pots and then put the dowel into the pot
  • Make a layer of hot glue over the styrofoam and then spoon dirt over
  • Voila!

Saturday, March 16, 2013

A Wee Bit O'Green - Making Mini Topiaries

1 comments
The new, yet unfinished, topiaries, in their
rightful place.
I am working on making little topiaries for the entrance.  I have to figure out how to make miniature dirt, but their are mostly finished.  I couldn't wait to put them out front, and I love the view through the windows!  It's like I'm spying on mini people.  I adore the view of things through windows.  It's like you only look straight across or up, and most of the distracting crap in a home is hovering lower, so all houses look great peering in through a window.

I still have to fix the corner of the front door.  I tried putting some wood putty on it, and attempted sanding it, but it's in such a tight space.  This is the part I don't like: big fixer-upper jobs.  I much prefer fiddly little things. 

My panel is more yellowed
and, sadly, browned.
I am also trying to create new windows since the casting of the one original window IS JUST NOT WORKING!!  I have tried around five different mold, only one of which I got to the actual casting phase.  That one I didn't see the point of mold release (or mildew remover, as the woman at the craft store called it).  Now I understand why.  These molds are killing me.  So I am trying a new approach using salvaged commercial ceiling light panels.  I'm pretty much betting they'll look horrible. 

Sunday, March 3, 2013

My Mini Miniaturist

1 comments
Look at what Tootie Pie did!  Lighting for the bedrooms.  Sure, it's just two little flashlights suspended from the ceiling with tape, but not a bad first effort.  She is also responsible for moving the refrigerator into the children's room and the bureau drawers in front of the door. 
 
I finished the Egg chair.  It is a bit crooked.  Tutorial to follow.  I have also been working on setting up my tutorials on Pinterest, and trying to scan my logo so that it's clearer.  As you can see, I have NOT improved the header on the blog.  I am also trying new linens for the master bedroom.  I still can't find a fabric that I'm happy with.  Even a scan of the wallpaper doesn't match the wallpaper (?!).  Should I add an accent color, such as orange?

Tuesday, February 26, 2013

Two New Accessories

1 comments
I've addressed the lack of bathroom towels in the bathroom; a bit late, of course, since we've lost a rug from drying off a wet critter.  It is constructed from two earring backs with a cut paper clip bar and a baby face cloth cut to size. 


I've also rebuilt a Nelson ball clock that was made over a year ago from pins, Sculpey clay and paper hands.  All of the balls had "fallen" out, so I reglued them.  It replaces the Sculpey mirror that I constructed that promptly broke.  As always, enjoy them now, for they will probably not last long.
 

The Hard Way Copyright © 2012 Design by Ipietoon Blogger Template

Blogging tips